












Quickly test tower tweaks directly in this build view. Changes are not saved.
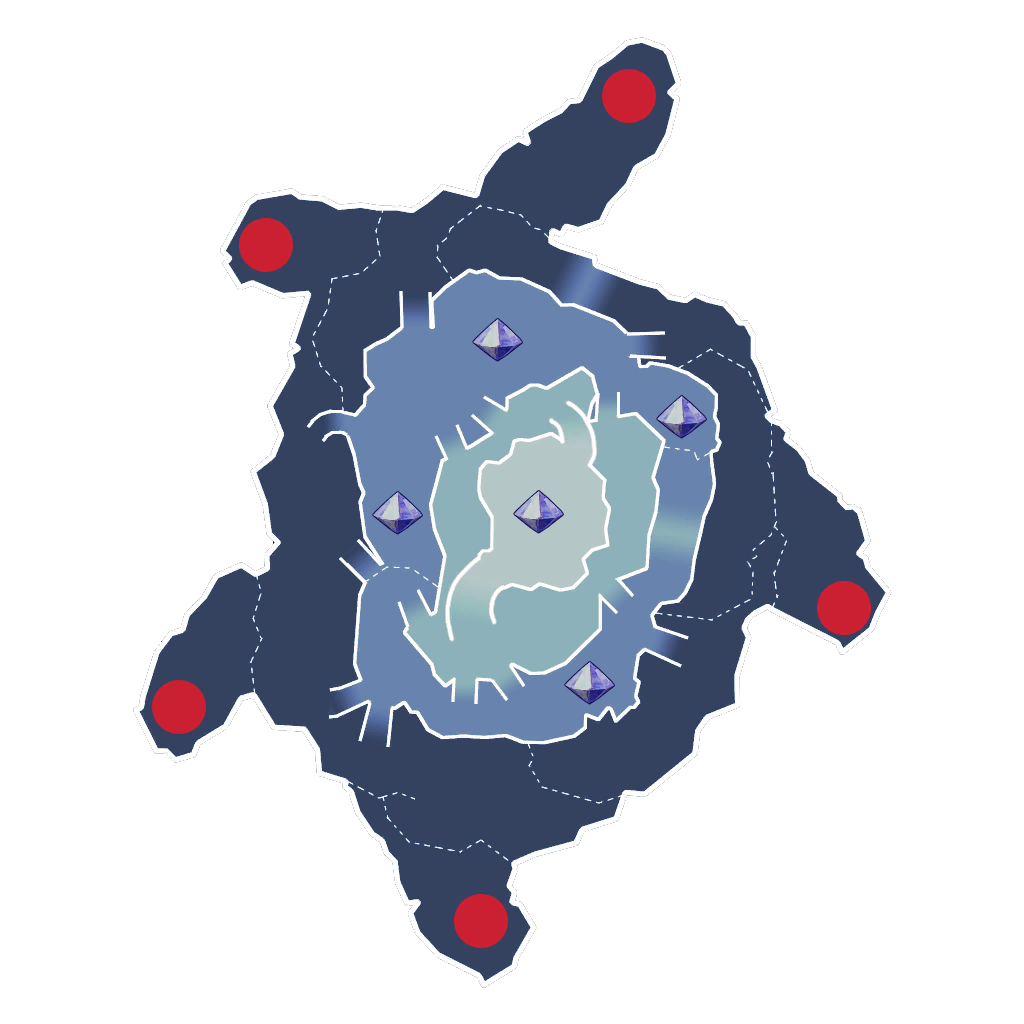
Click on a numbered hint marker on the map to zoom and highlight nearby towers. Double click on map to reset zoom.
No hint selected.
Highlight placed towers (Chrome limitation applies)


























































Build Status: Public
Difficulty: Any
Game Mode: Campaign
Hardcore: No
Ruthless: Yes
AFK Able: No
Mana Used: 0
Mana to Upgrade: 0
More Builds from susususumannn
Black arrows are mortar directions.
Use the last DU on whatever you like.
Golems are on the edges of each circle around the cores.
I used 1 jester dps with a cat pet thinking I needed to wheel for tower healing, but didn't need to. (Depending on stats you can go any ranged DPS.)
Build was really safe I completely ignored the demon lord bosses.
I used no splits, was purely for the achievement.
Pins 1-4 mortars are on the highground crystal clusters and the buff beams stretch down